The Export data feature in OrbiSCADA allows users to create and download data exports for a selected controller. Exports are created from the Admin tab using the Exports card.
Note: the Admin tab and the Export data feature are only available if your user account has the required permissions for the specific controller. If the Admin tab is not shown, your user does not have access to the Admin tab for the specific controller. If the Admin tab is shown, but the Exports card is not available, your user may not have the required Export data permission for that specific controller.
Where to find export data
- Log in to OrbiSCADA
- Open the controller you want to export data from
- Select the Admin tab
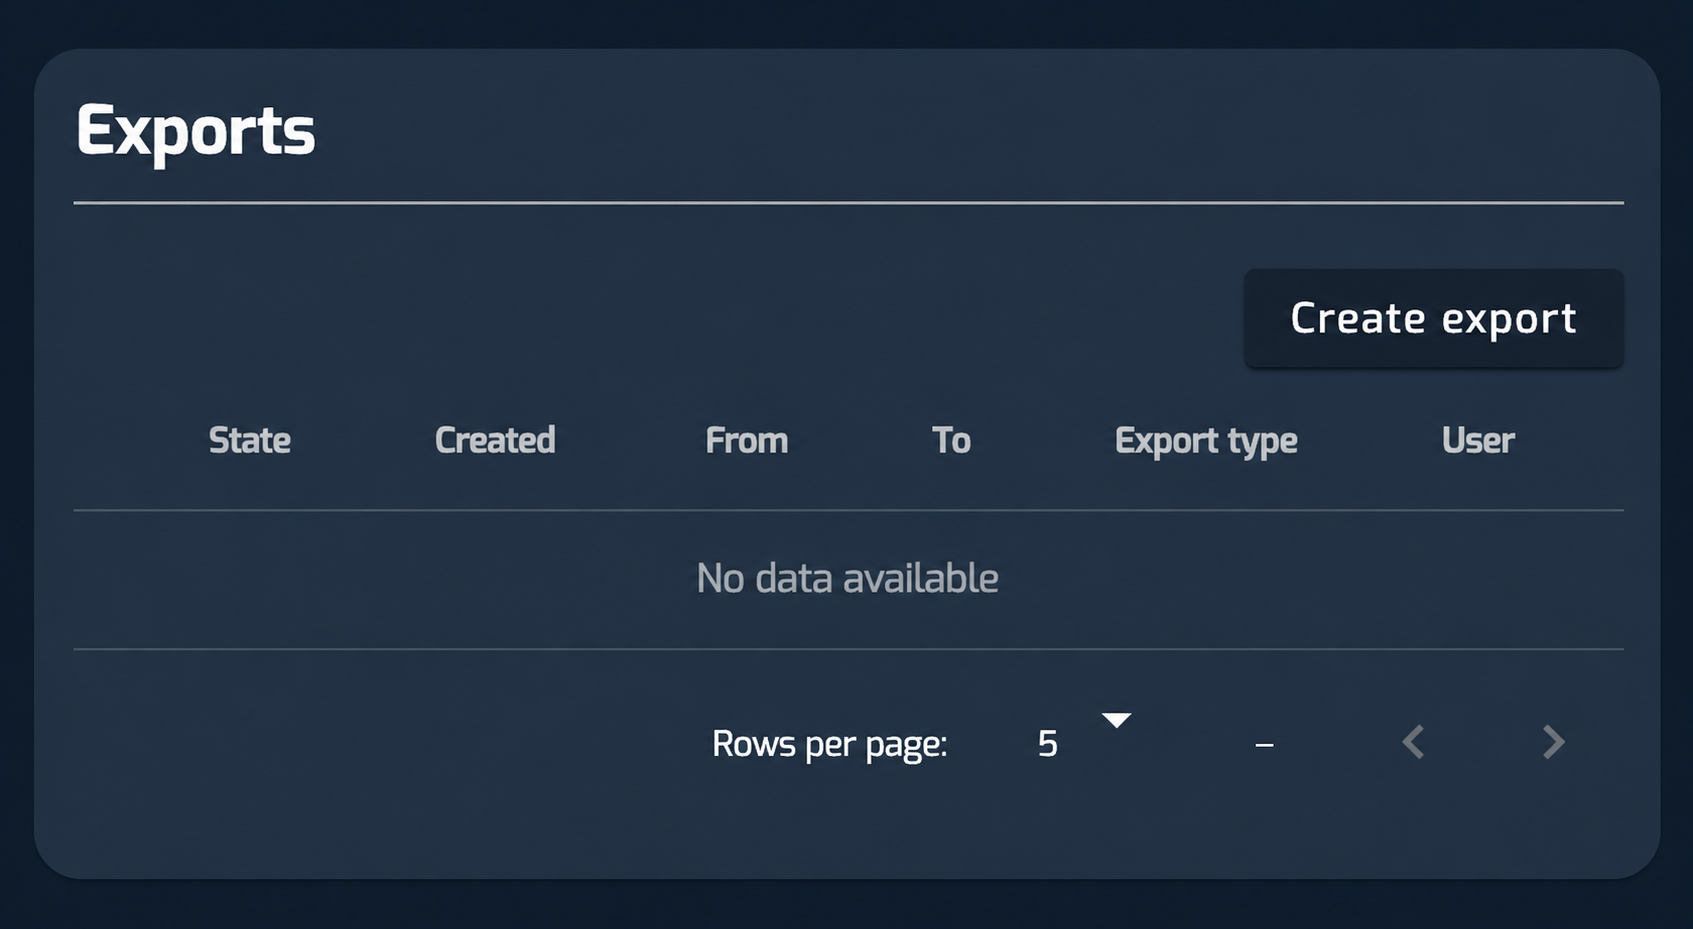
- Find the Exports card
- Click Create export
Create a new export
Click Create export in the Exports card.
This opens the Export data window.
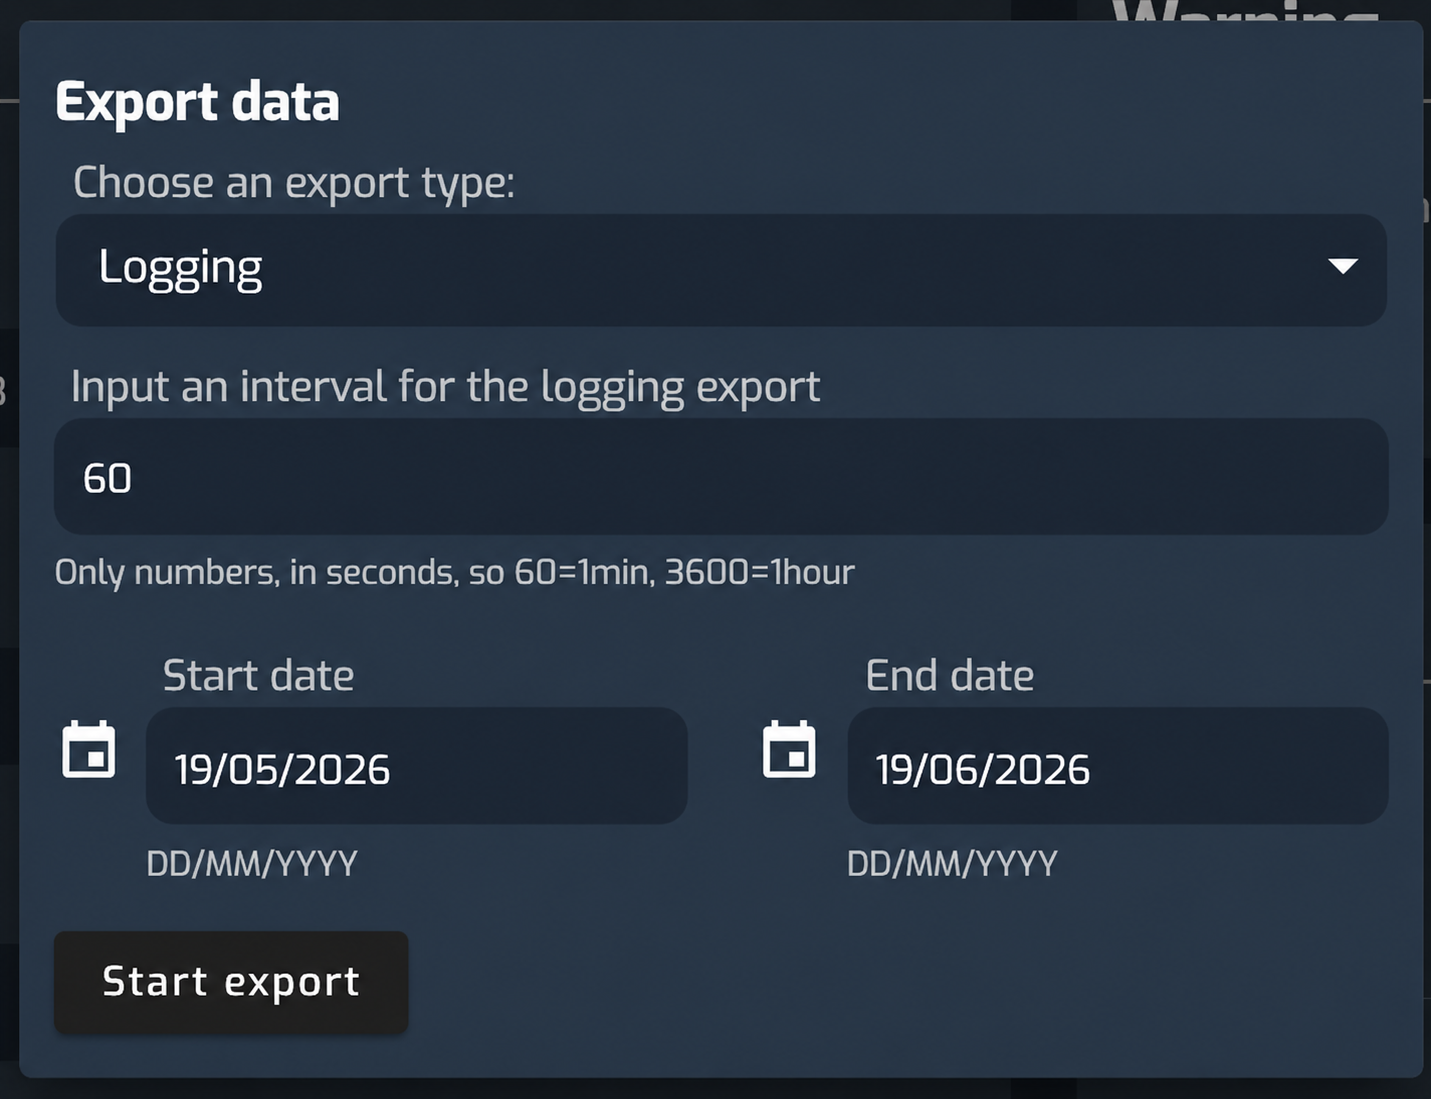
First, choose the export type from the dropdown menu. Available export types vary depending on the controller type and may include:
- Logging
- Duration report
- Digital I/O
- Parameter list
- Aggregated
- Events
- Power curve
- Production counters and Availability
Setting the interval for a Logging export
For a logging export, enter an interval for the export. The interval must be entered as a number in seconds. Examples:
- 60 = 1 minute
- 300 = 5 minutes
- 3600 = 1 hour
Selecting start and end date
Select the start date and end date for the export period. By default, the date range is set to the latest one-month period, with the start date one month before the current date and the end date set to the current date. The date format is:
- DD/MM/YYYY
Clicking either the Start date or End date field opens a calendar. Use the calendar to browse to another year, month and date if you need a different export period.
When the export type, interval if required, start date and end date are selected, click Start export.
Download an export
When an export has been created, it appears in the Exports table.
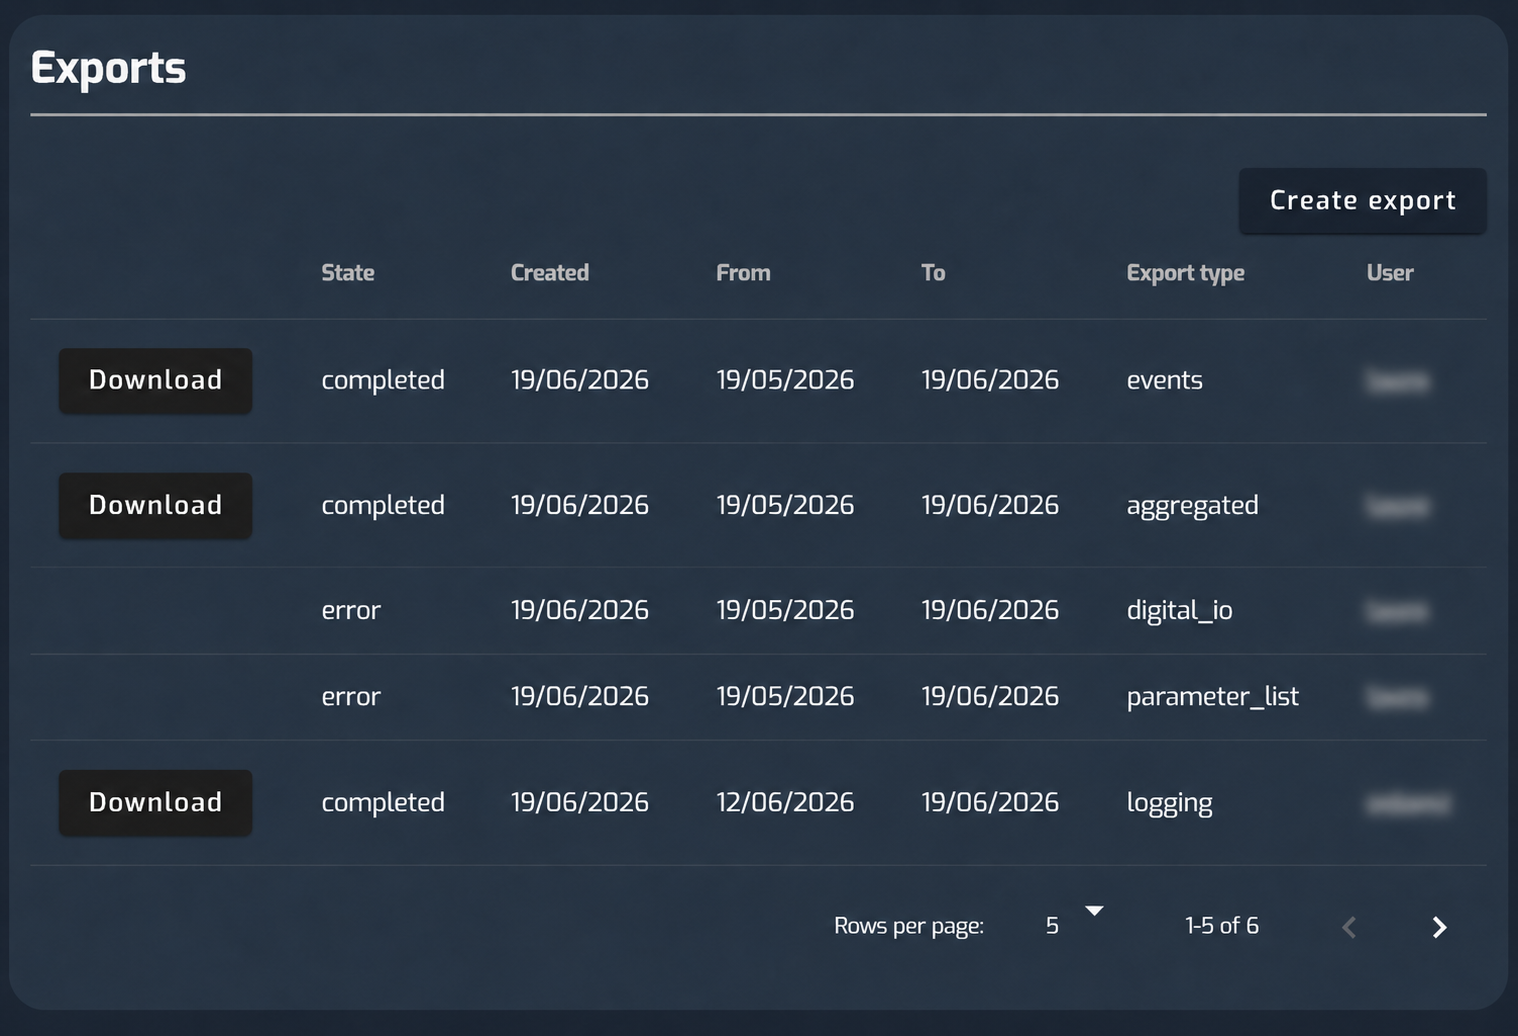
The table shows previous exports for the selected controller. This includes exports created by the current logged-in user and exports created by other users.
When an export is ready, the state is shown as completed. A button appears in the same row so you can save the export file.
If an export cannot be created, the state may be shown as error. In this case, no download file is generated, and no Download button is available for that export row.
If no exports have been created for the selected controller, the table shows No data available.
Export content
The content of the downloaded export depends on the selected export type and the controller type. If you try to create an export for data that does not exist for the controller type, the export may fail and appear with the state error in the Exports table.
For example, a logging export from a VMP 5000 controller may include time stamped values such as:
- Error, mode and state information
- Production counters
- Current, voltage and frequency
- Temperature measurements
- Power factor
- Nominal power and power set point
- Grid power total
- Pitch angle
- Nacelle direction
- Wind direction and wind speed
- Generator RPM
- Rotor RPM
Other controller types may include different columns or values.
Opening a CSV file in Excel
Some export types are downloaded as CSV files. In some Excel setups, the CSV file opens directly with the values separated into columns.
If all data appears in one column, use Excel’s import or split-column function:
- Open Excel.
- Go to Data
- Choose From Text/CSV, or open the file and use Text to Columns
- Select Delimited
- Choose Comma as the delimiter
- Confirm the import
For readability, it can also help to:
- Freeze the first row
- Add filters to the header row
- Format the Timestamp column as date/time
- Adjust the column widths
Was this article helpful?
That’s Great!
Thank you for your feedback
Sorry! We couldn't be helpful
Thank you for your feedback
Feedback sent
We appreciate your effort and will try to fix the article